![]() Content File Manager
Content File Manager
File Manager - The File Manager is a library that holds all the files that are on your site, such as, images and PDFs. However, we do not recommend keeping videos in the file manager. The file manager does use your disk space, to which every site has a limited amount. Check with your sales rep or support, if you wish to know how much disk space you currently have and how to add more if needed.
While logged into the back end of your site (yourdomain.com/admin), click on Content.
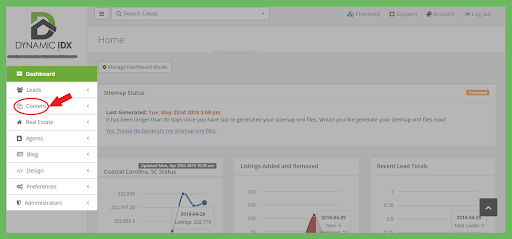
The first tab under the Content section is the File Manager.

Once in the File Manager section, you’ll see two buttons at the top of the main page, Upload Files and Create New Directory.
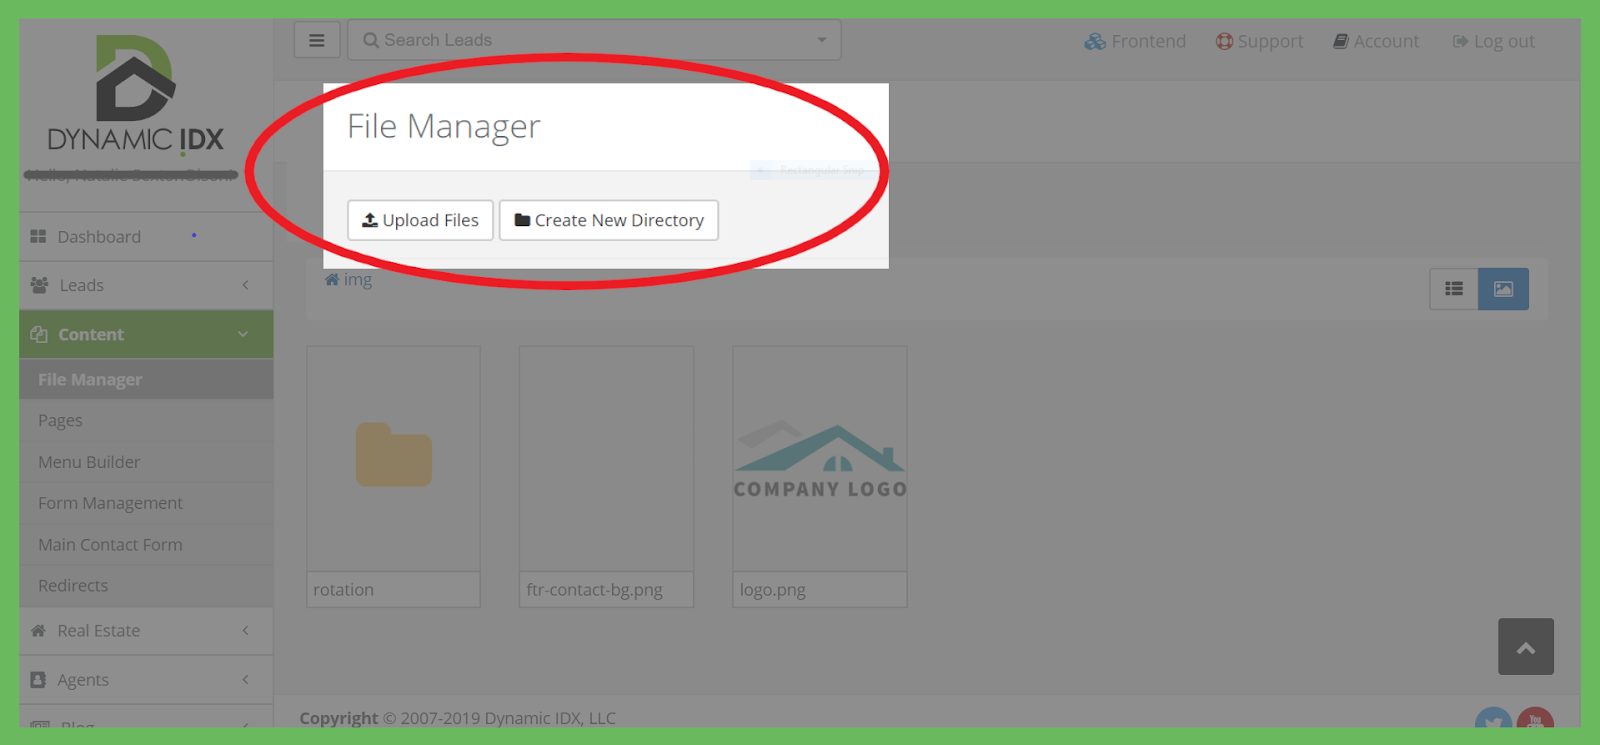
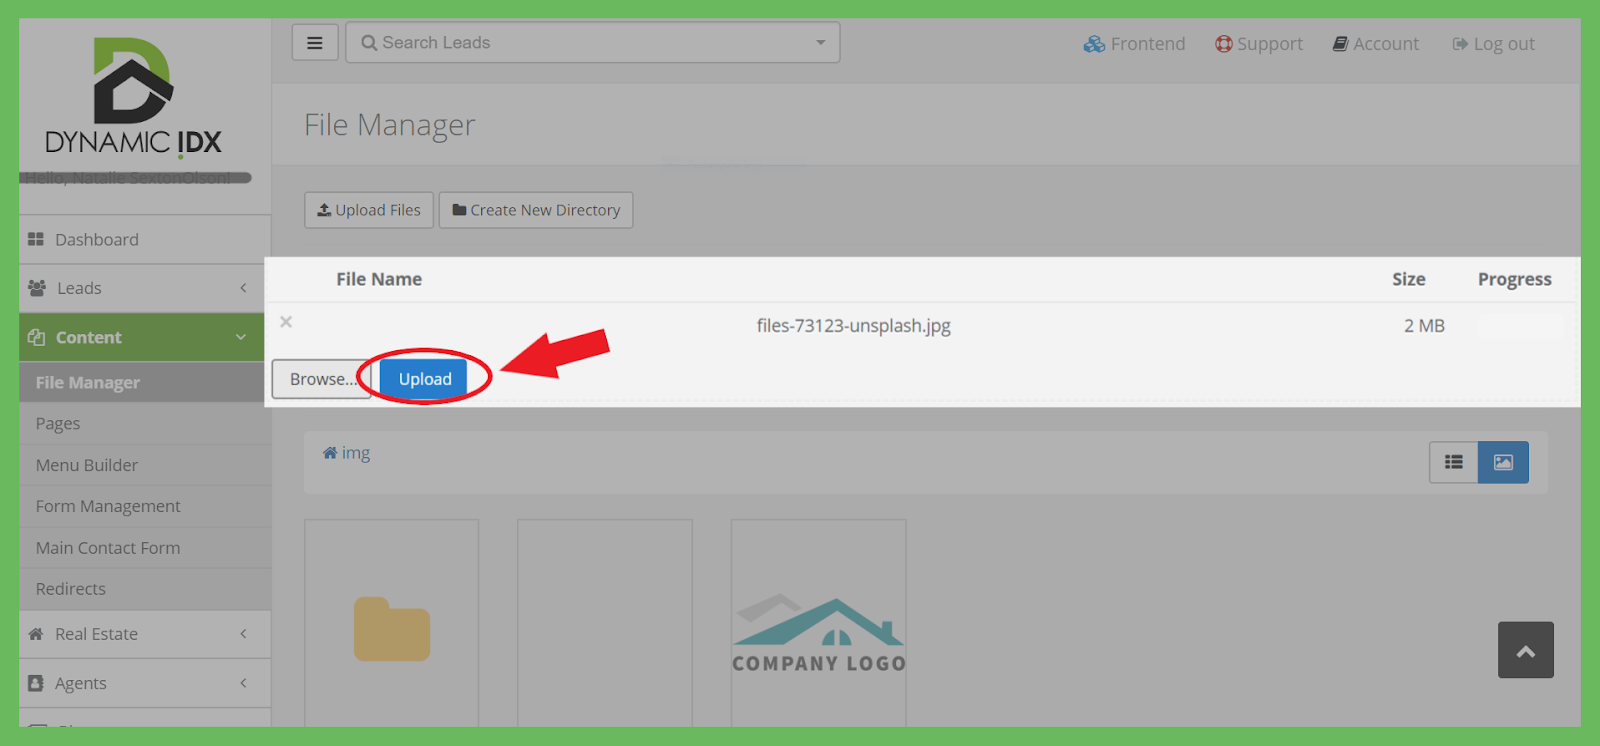
Click Upload Files to move images from your computer to your file manager.

After clicking Upload Files, click the Browse button, and choose which file you’d like to upload.
Once you choose your file from your computer, the file will pop up above the browse button showing the name and size.
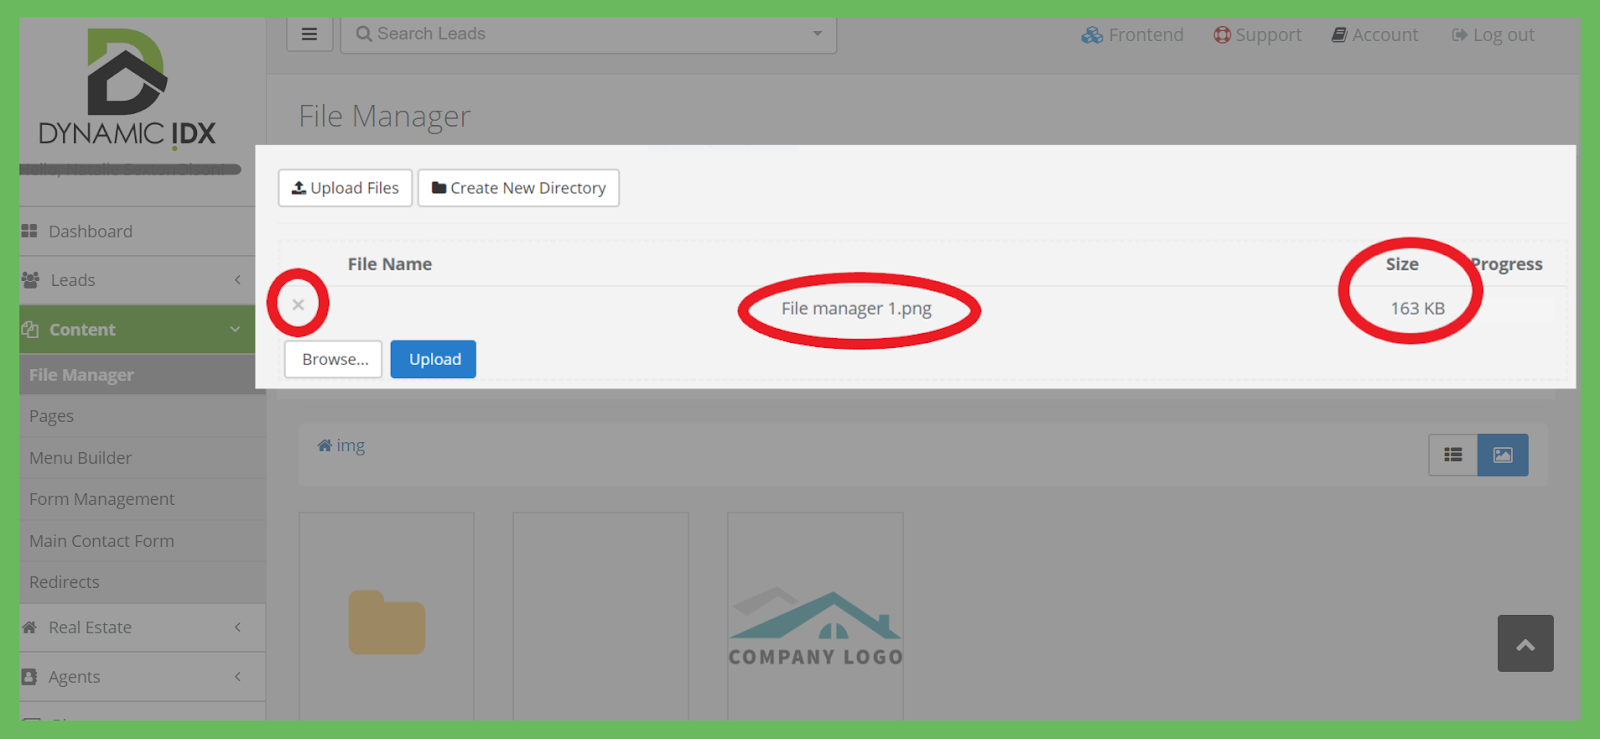
You can click the small [x] on the bottom left of the file if you wish to remove it.
Once you’re ready, click the blue Upload button to upload your file to the file manager.
Note that if you wish to upload your file to a certain directory (folder), you must first have that folder open. There will be breadcrumbs right below the browse button so you know what directory you’re in.
Click Create New Directory to create a new folder for files.

After clicking Create New Directory, a green box will pop up asking you to enter the folder name.
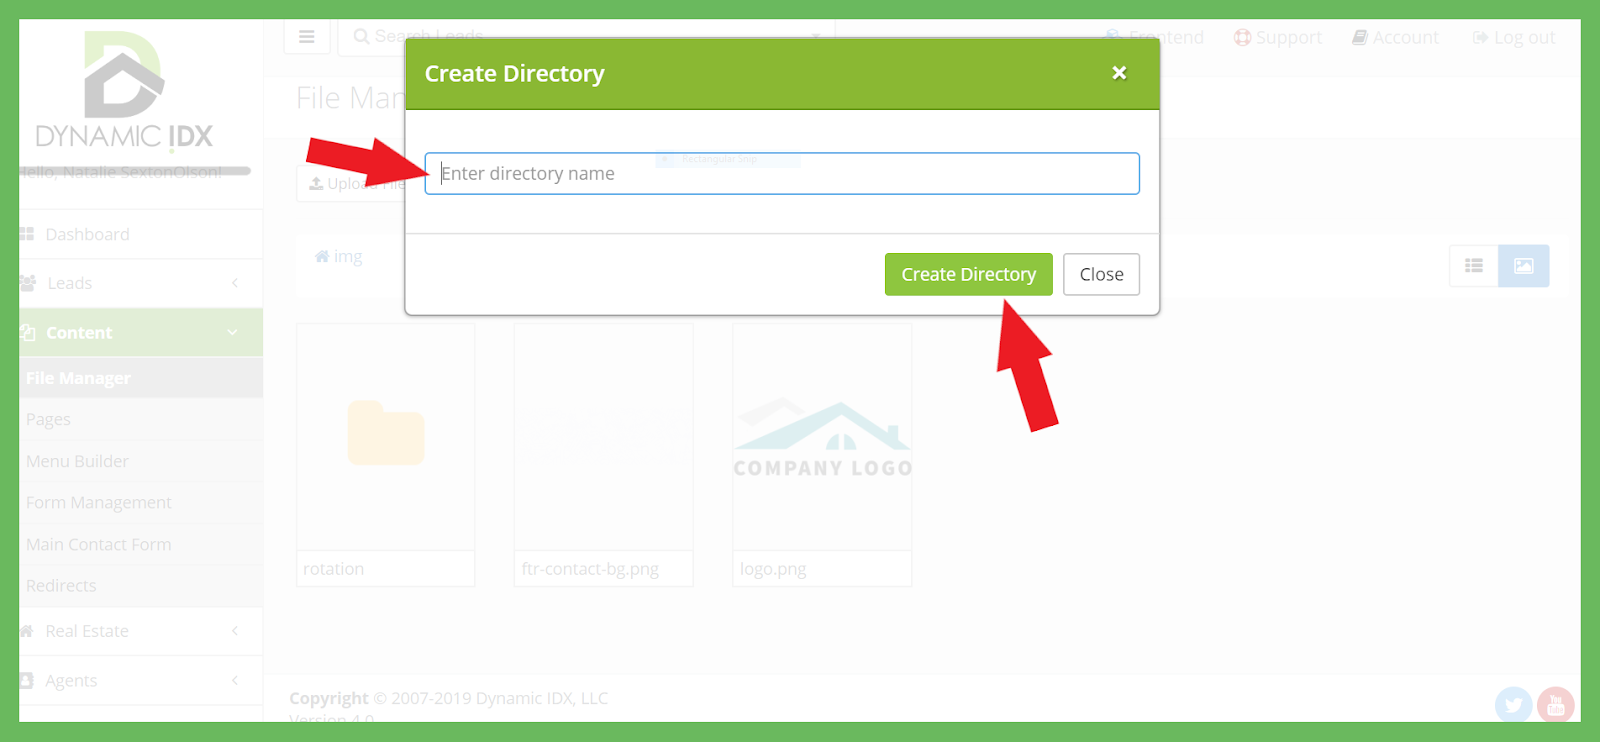
Once you’ve named your new folder, click Create Directory. This will automatically open this folder, so you can start uploading files to it.
You will see your list of folders and any images that were not placed in a folder on the main page of the File Manager.
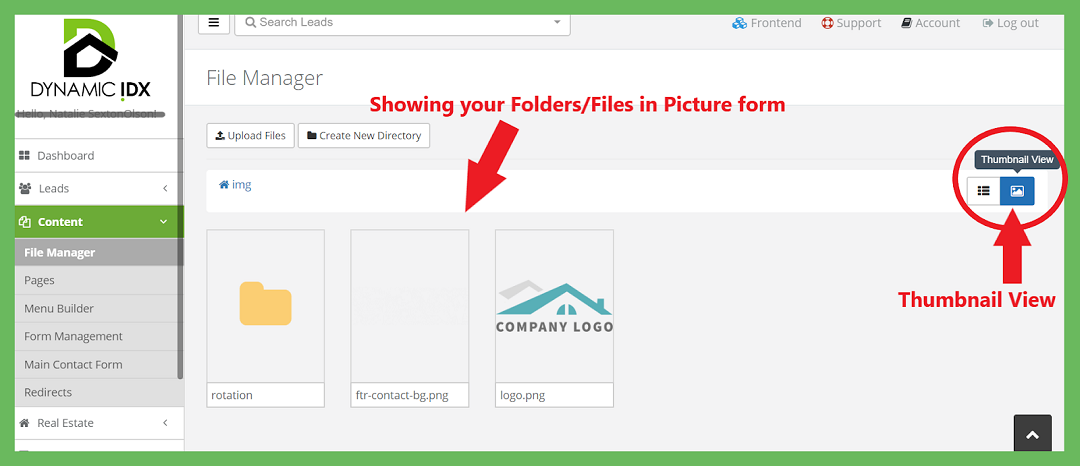
When on any page of the File Manager, you will see that there are two smaller buttons to the right of the breadcrumbs.
The one on the right is Thumbnail View, showing you your files and directories in picture form.
The one on the left is List View, showing you your files and directories in a list with text.
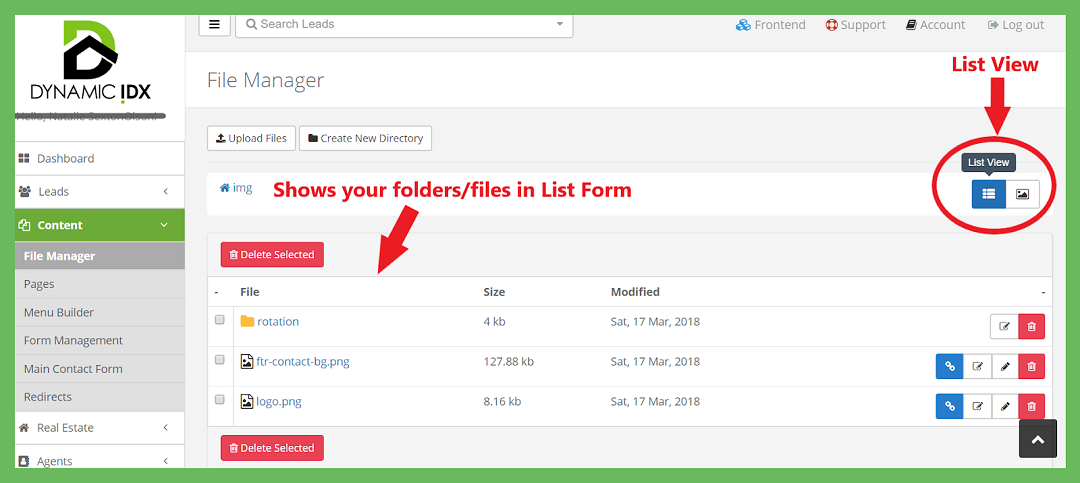
When in List View: (See Below)
You can click the Pencil icon to the right of a file/directory to edit the name.
You can click the red trash can icon to the right of a file/directory to delete it.
You can click on the blue link icon to the right of the file to see the exact location of that file.
To remove multiple Directories and/or Files at once click the small box to the left of each that you wish to delete.
Then click the red Delete Selected button.

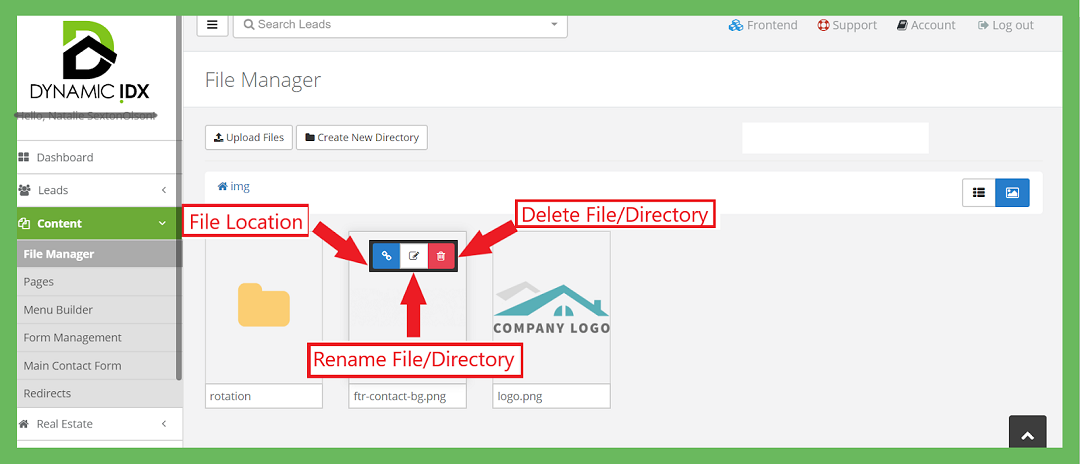
When in Thumbnail View: (See Below)
Hover your cursor over the folder/file and icons will appear.
You can click the Pencil icon to edit the File/Directory name.
You can click the red trash can icon to delete the File/Directory.
You can click on the blue link icon to see the exact location of that file.