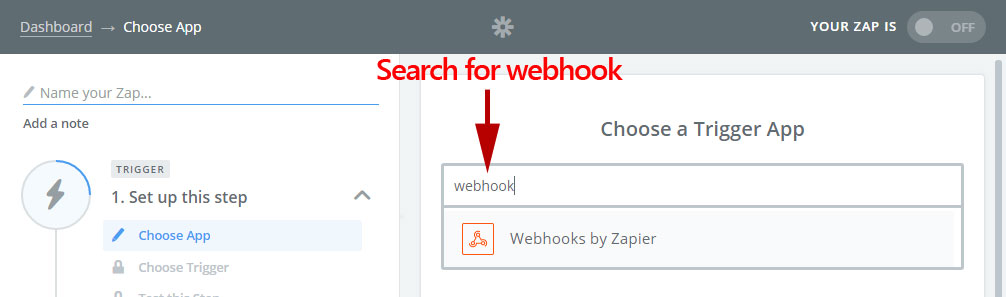
2) From the dashboard, type in "webhook" into the Choose a Trigger App search box and select the "Webhooks By Zapier" option.
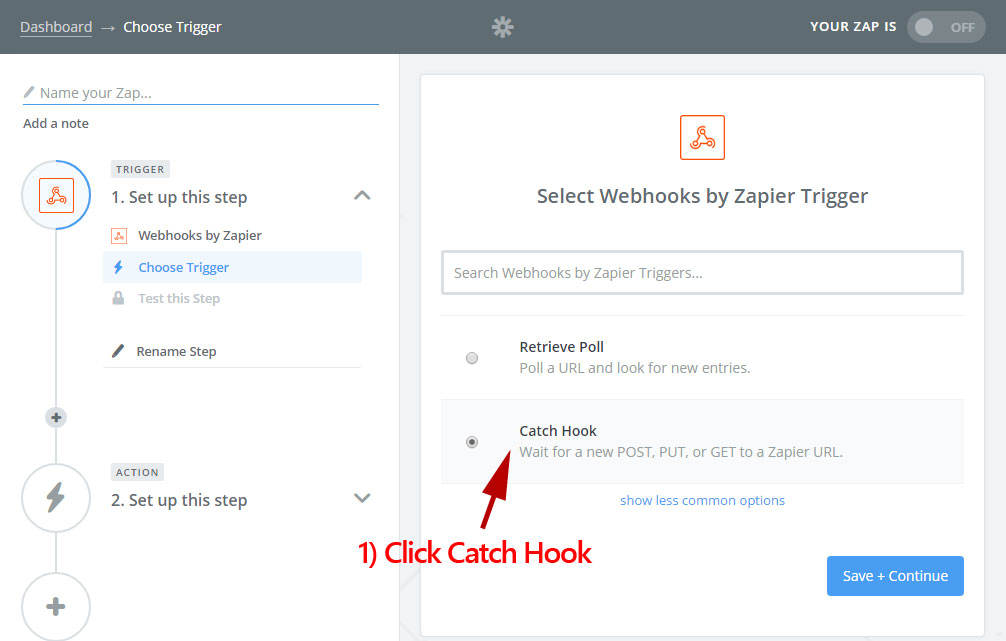
3) Click the Catch Hook option, then click Save + Continue to proceed.
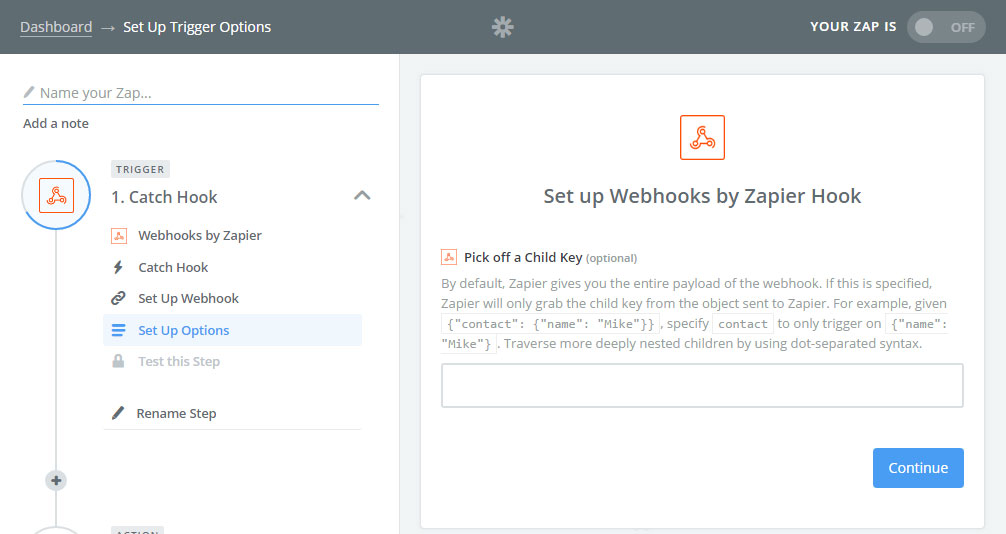
4) The next screen allows you to "Pick off a Child key" and it's entirely optional, and you should skip this. So click the Continue button to skip ahead.
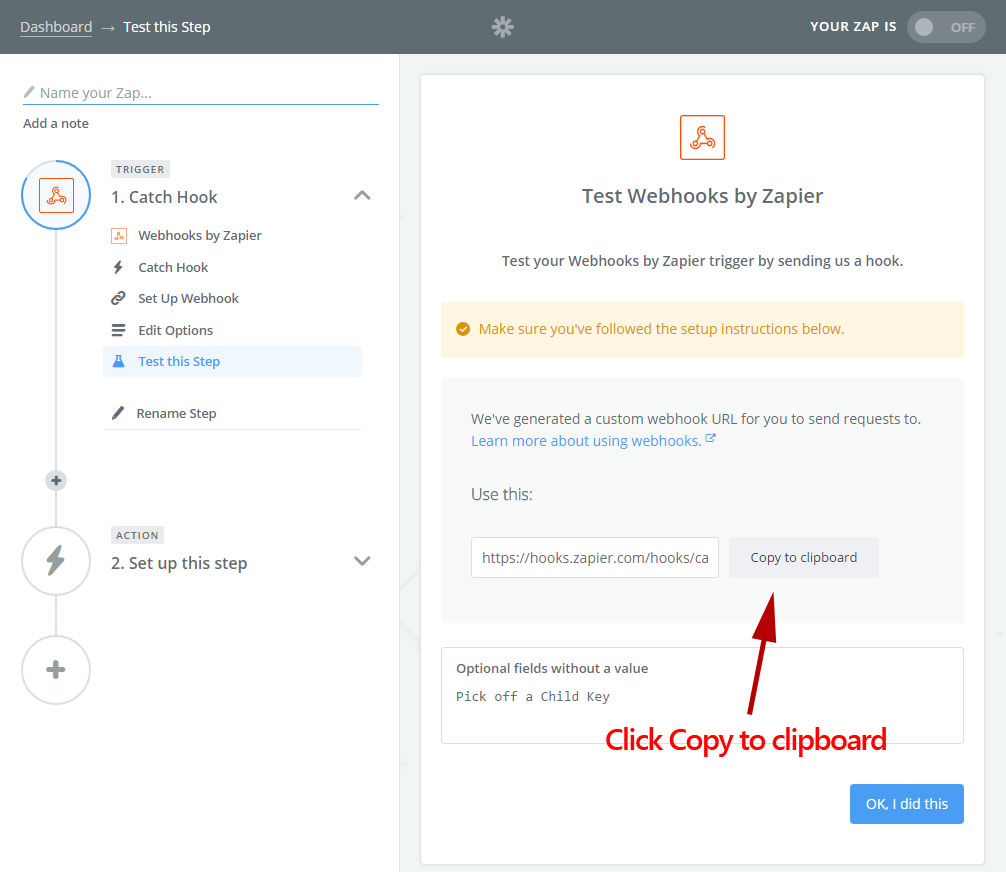
5) You should now see a screen similar to the screenshot below. Click "Copy to clipboard" to copy the webhook url which will be used on the backend of your website, But DO NOT click the "OK, I did this" button yet.
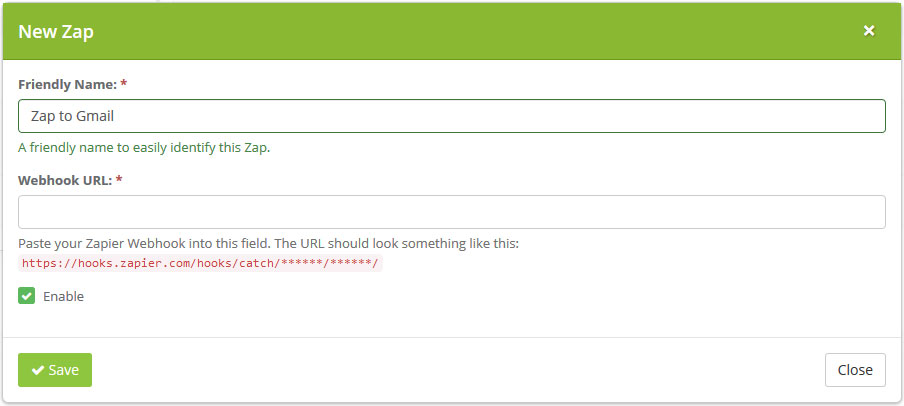
6) Open another Tab, or Window and login to the backend of your website. From the backend of your website, navigate to Preferences -> Zapier Lead Hooks. Click the "+ New Zap" button. A modal window will popup as seen below. Give your Zap a friendly name based on what this Zap will be setup to do. Then paste in the webhook url you copied in the previous step to the "Webhook URL" field. Then click Save.
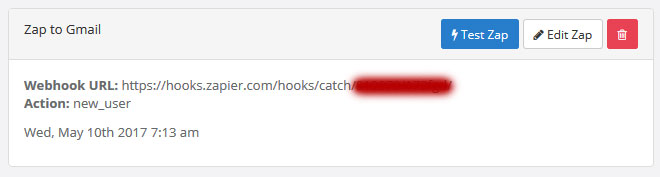
7) You should now see your Zap webhook created like seen in the screenshot below. Now Click "Test Zap". This will send some test data to Zapier, which you will use to populate your Zapier Action and any optional Zapier Filter you setup.
8) Now go back to your Zapier tab or window you had open from step 5 and click the "OK, I did this" button. This will test the trigger you just setup. You should see a screen like the one in the below screenshot with a "Test Successful!" message. Now click the Continue button to proceed.

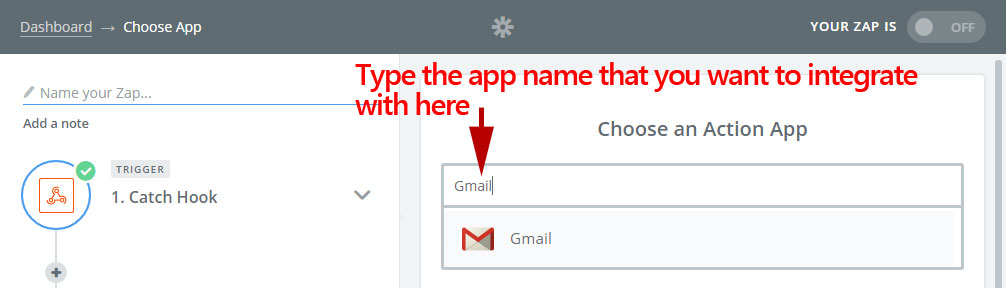
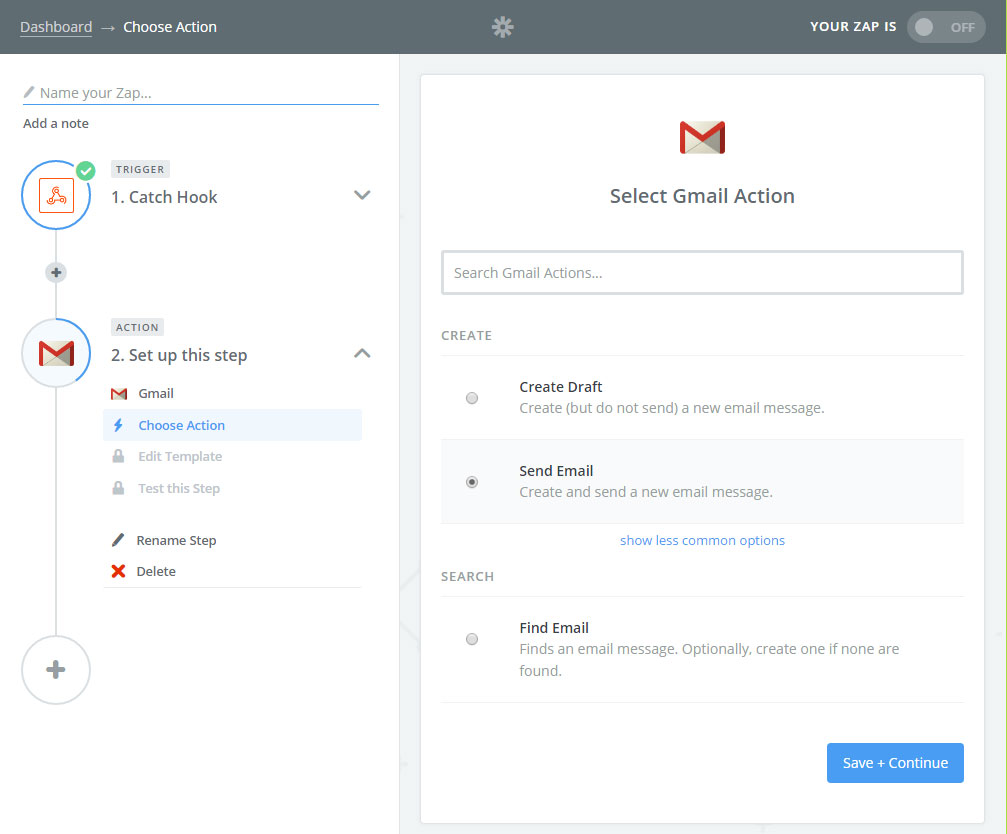
9) Setting up your Zapier Action! Zapier has hundreds of apps that you can integrate with, but for this example we're going to do a simple Gmail integration for our action. Type "Gmail" or whatever app name you want to integrate into the Choose an Action App text field and select it.
10) The next screen will differ based on the App you selected. For our app, we are presented with the following screenshot. We'll go ahead and click "Send Email" and then Save + Continue.
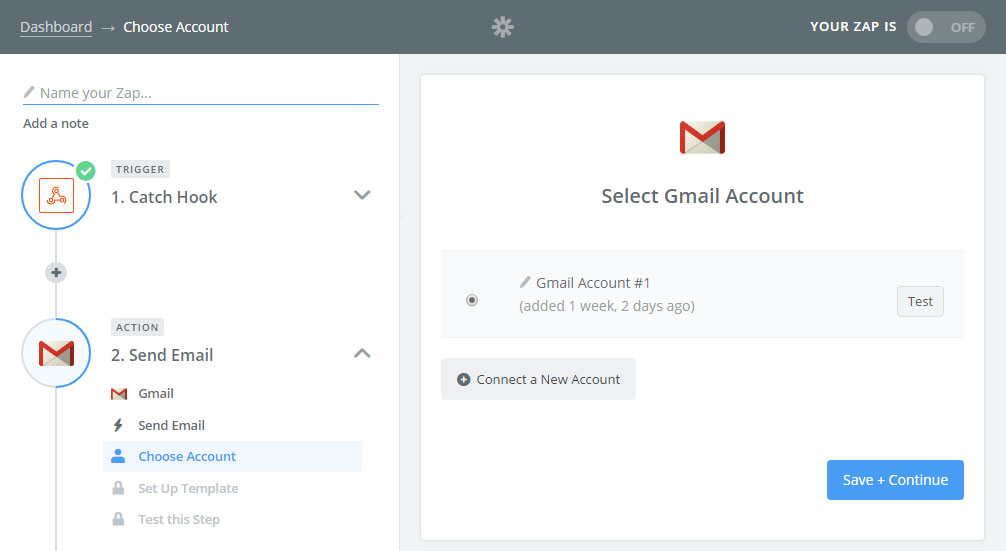
11) Next you will be prompted to connect your Google Account to your Zapier account. Please note, that if your setting up Constant Contact integration or Mailchimp or whatever other App your integrating you will be prompted to connect those accounts instead. For this help documentation we're doing Gmail so we'll connect our Google Account and then click Save + Continue.
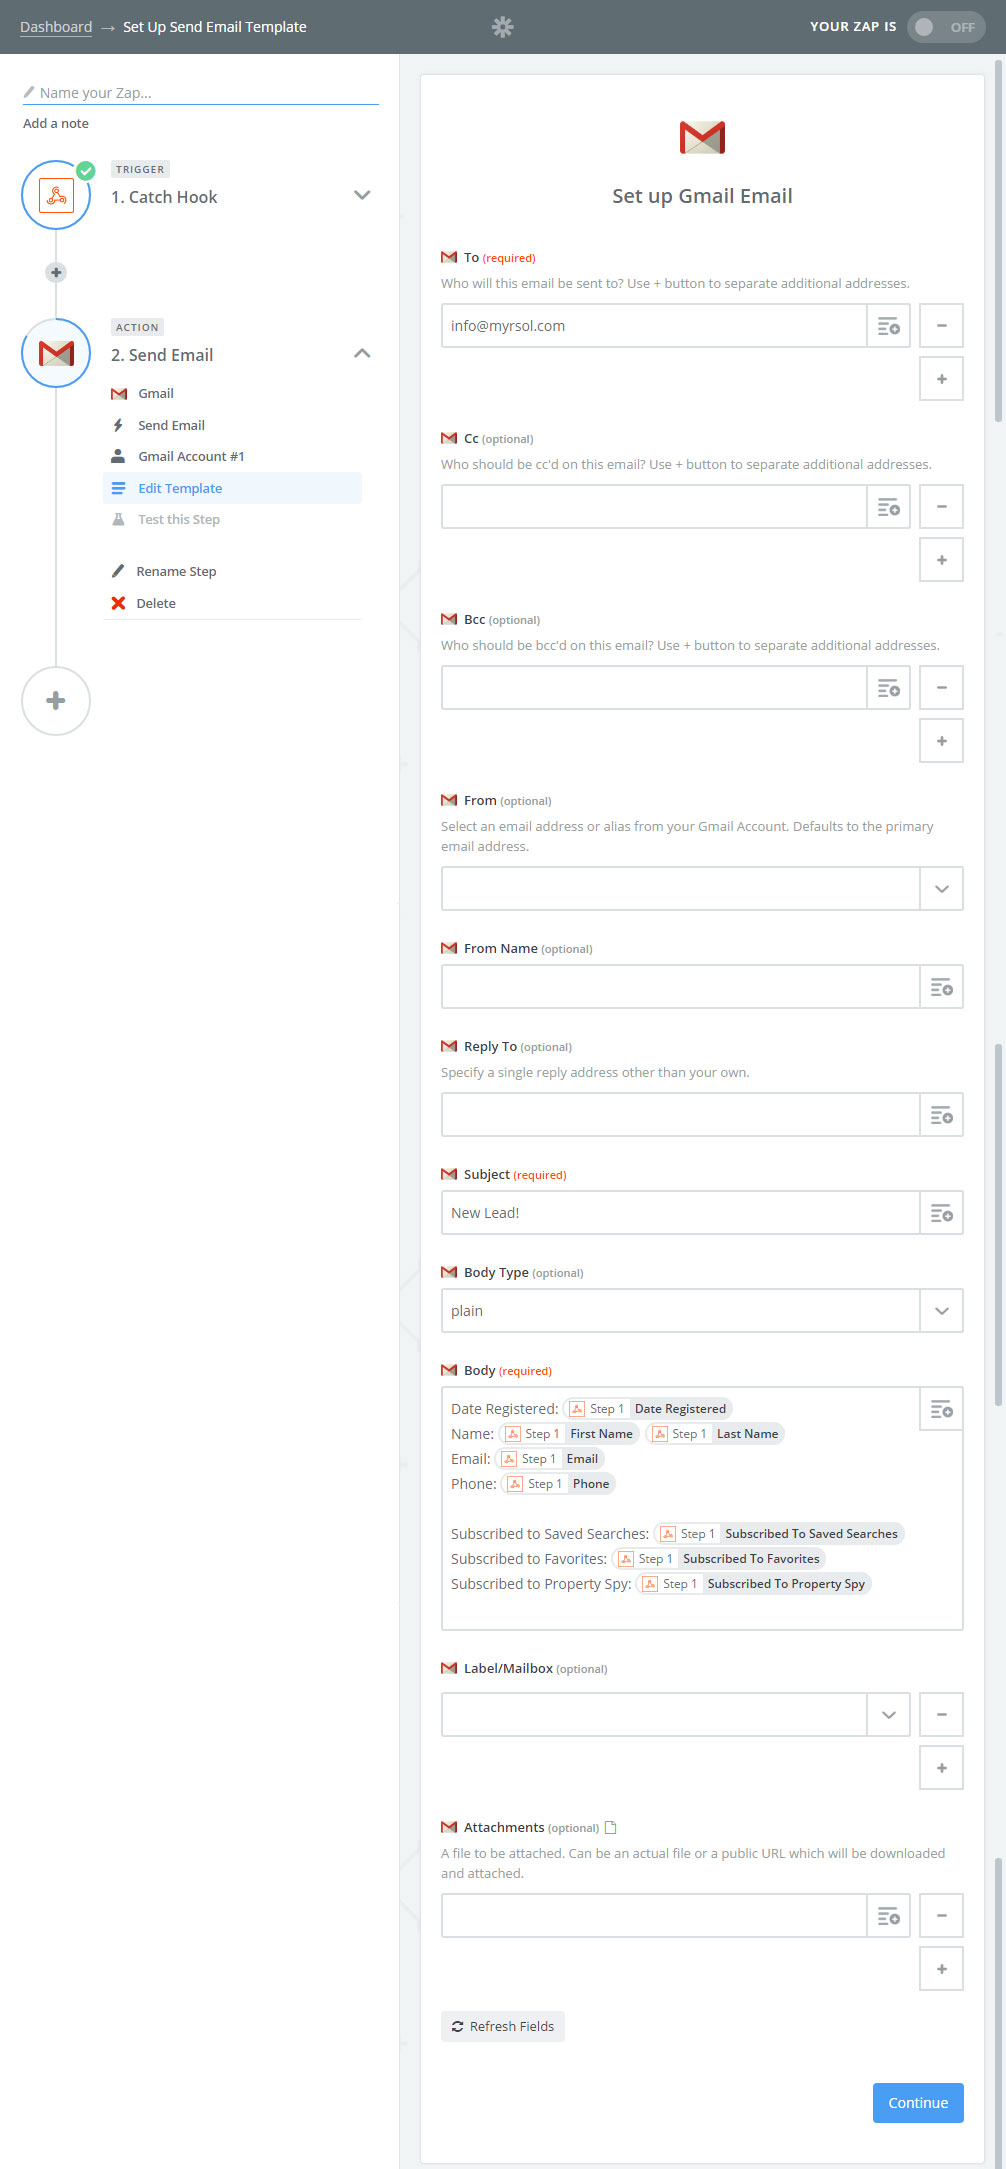
12) Now the fun part begins. Depending on the app you selected to integrate, this next step could take you a little bit to setup how you want it. Usually however it can be done in minutes. You will need to map the data from the trigger we setup earlier to output into the app that your integrating. Zapier makes this really really simple! On the right side of each input, you'll see a button to insert field. This will display the data fields that you use within Zapier. The screenshot below will show how we're using the data in this example. Populate this step how you want, making sure all required fields are filled out and click Continue to proceed.
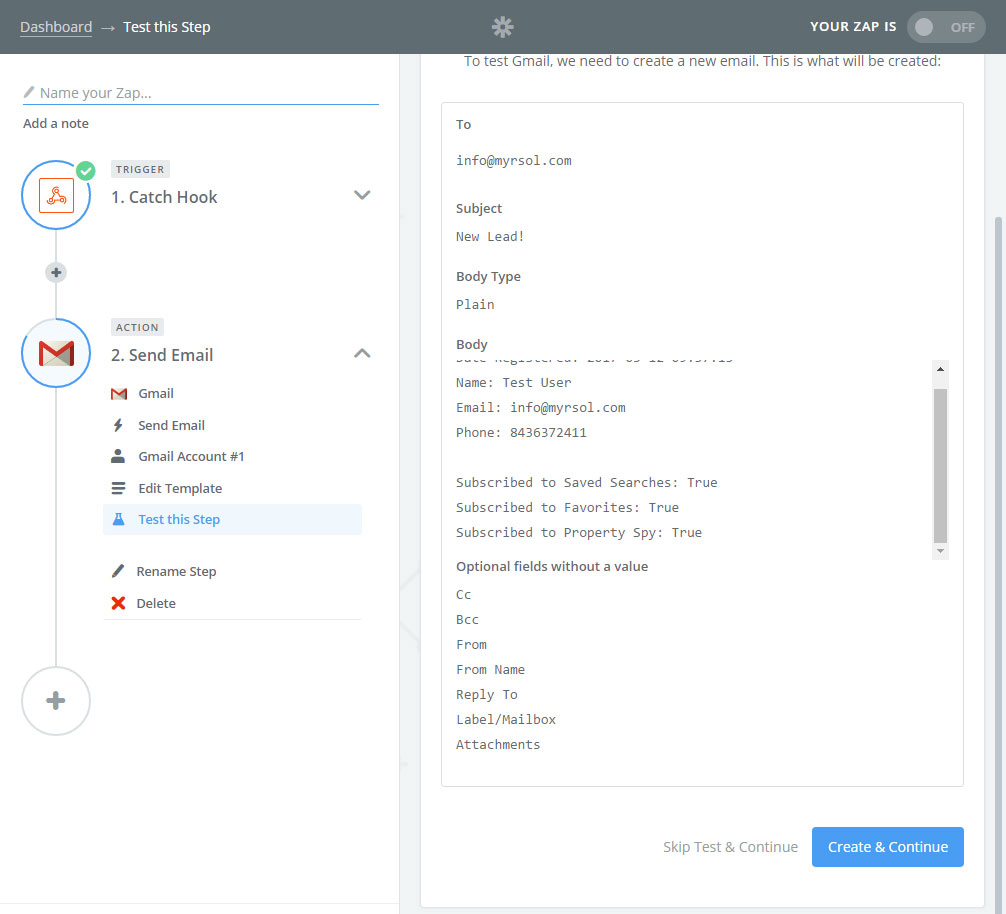
13) We're almost done! Now it's time to test and finalize the App integration to make sure everything works. You should see a screen similar to the one in the below screenshot. Click Create & Continue to save your app and send a test. Note depending on the app your integrating, the test will differ. In this example, we're using Gmail for our integration, so it will send an email. For Constant Contact, or Mailchimp, it will import a contact.
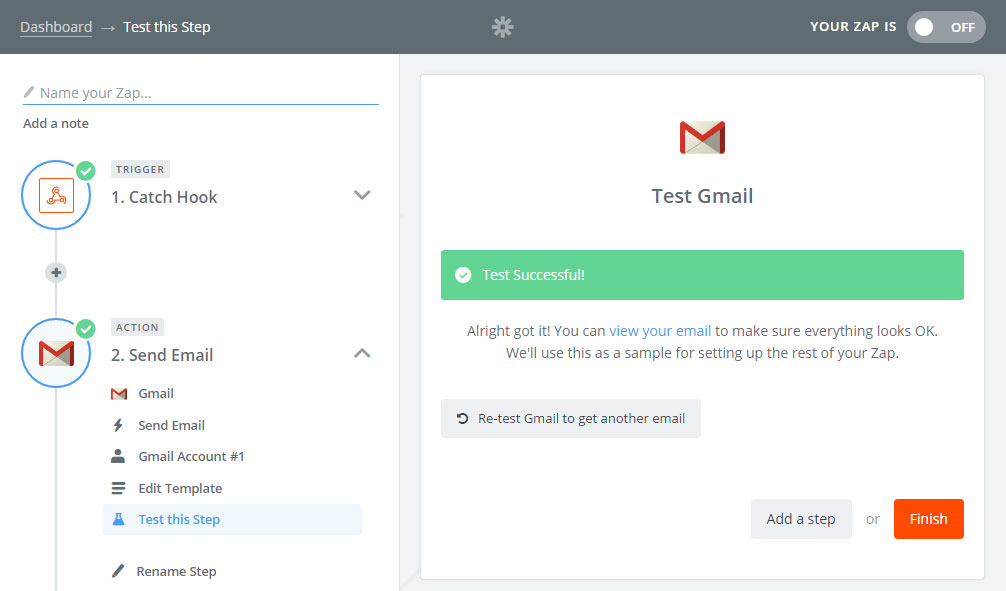
14) Zapier should have now run a test, and you should see a "Test Successful!" as shown below. Click Finish. Did you think we were done yet?
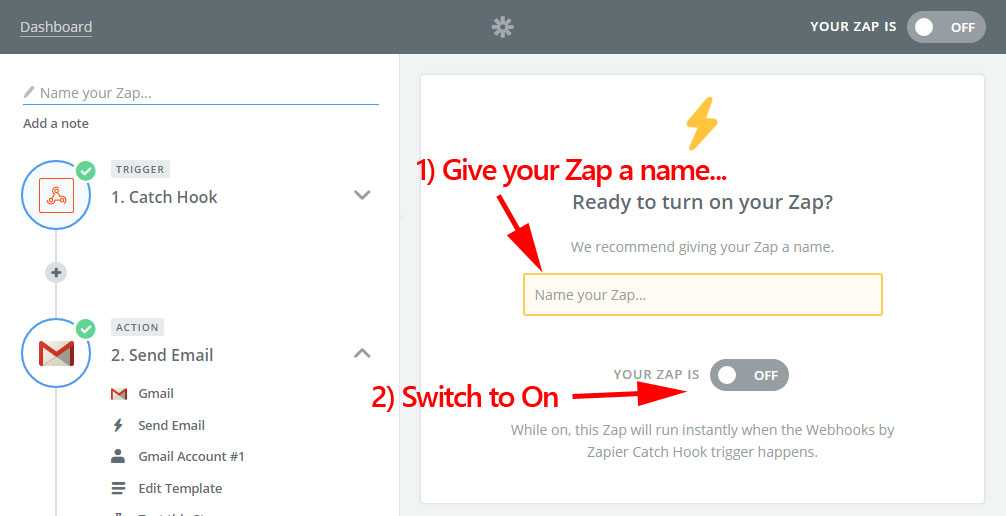
15) Final step! Give your Zap a friendly name like "Zap to Gmail". And then click the "Off" selector to change it to On. Now click Finish! Your done!
12) Now the fun part begins. Depending on the app you selected to integrate, this next step could take you a little bit to setup how you want it. Usually however it can be done in minutes. You will need to map the data from the trigger we setup earlier to output into the app that your integrating. Zapier makes this really really simple! On the right side of each input, you'll see a button
13) We're almost done! Now it's time to test and finalize the App integration to make sure everything works. You should see a screen similar to the one in the below screenshot. Click Create & Continue to save your app and send a test. Note depending on the app your integrating, the test will differ. In this example, we're using Gmail for our integration, so it will send an email. For Constant Contact, or Mailchimp, it will import a contact.
14) Zapier should have now run a test, and you should see a "Test Successful!" as shown below. Click Finish. Did you think we were done yet?
15) Final step! Give your Zap a friendly name like "Zap to Gmail". And then click the "Off" selector to change it to On. Now click Finish! Your done!
