 Leads
Leads
Our system separates your leads into two groups: “Leads with Accounts” and “Leads without accounts”. Leads with accounts are registered users who have filled out the registration form, whereas, leads without accounts are users who are not registered.
On the back end of your website (yourdomain.com/admin) you will see that you can click on “Leads” on the left admin panel and choose options to see your leads with accounts, without accounts, or all leads. No matter which list you choose to view, the page navigation will be the same.
-
At the top of the page, you will see the page title saying either “With Accounts” or “Without Accounts”, or if you’re viewing all leads, it will say “Leads”. There is also a number next to the title, telling you how many leads are in this group.
-
Below the page title, you will see five boxes labeled Lead Filtering, Lead Accounts, New Lead Account, Tags, and Export.
a. Lead Filtering - if you click on the lead filtering button, a box will pop up allowing you to select from options to better filter your leads the way you’d like. You can filter through things like the date range the accounts were created, which agent the lead is assigned to, whether they have an account or not, or simply their name or email.
b. Lead Accounts - By clicking the lead accounts button, this will navigate you to a separate page showing you a list of all registered users accounts. This is where you can view accounts for leads, agents, admins or all of them together.
c. New Lead Account - Simply click this box to manually enter a new lead account. There is also a tab on the left admin panel (Leads > New Account) that will take you to this same page. Once you’ve clicked this button, follow these steps to manually add a new lead account:
ii. Add the leads personal information (Name, address, phone number)
iii. Add the leads login information (email and password). These are the credentials they will use to log into your site.
iv. Edit the User Options, if necessary. The first three options will be checked at default. We recommend keeping these boxes checked.
v. Click Save!
d. Tags - You can label leads by putting tags on them. If you have put tags on any of your leads you can click this button and a box will pop up allowing you to enter 1 or more tags to filter your leads.
e. Export - By clicking this button, the system will automatically export your leads to a list on your computer. Note that your leads will be exported based on the criteria that you’ve filtered your leads by.
3. The next image you’ll see below is a legend with multiple colored triangles that show up on a lead if applicable. These colors include grouping for leads who have logged in within the past day, the past 15 days, have been recently assigned to a new agent or if they have an invalid email address.
4. Finally, you will see your list of leads. This list is a quick view of your leads which has three columns:
a. The first column shows their name, the date they last inquired, and their last login date.
b. In the next column, you will see their email, if they are assigned to an agent and icons that show if they have an account and if they are subscribed to saved searches, favorites and/or property spy. These are all things you can edit in their account.
c. The final column shows the lead stats. These stats are a quick view of how many inquiries this lead has made, along with the number of saved searches, favorited properties, notes and subscribed email tracking.
d. There is a drop down box at the top of this list labeled “Display” where you can uncheck boxes to choose which of these columns you’d like to show or hide.
5. The box next to the display box labeled “Default Group” is where you can choose lead groups where you’d like to move leads to. Follow these steps to move leads to a new group:
a. Select one or more leads to move.
b. Select which group you’d like to move them to from the drop down box.
c. Click 'Move Selected'.
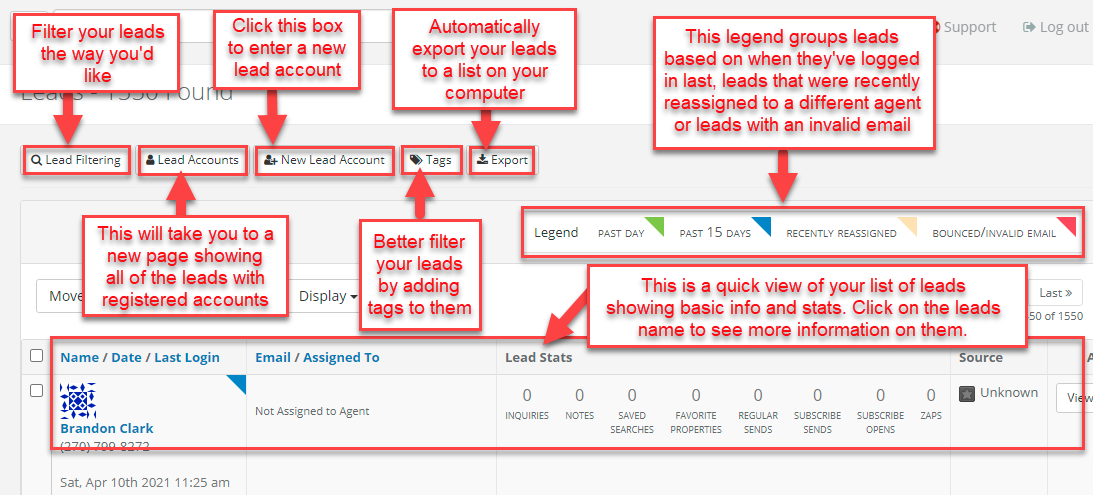
6. By clicking on a leads name, you will be taken to a summary page. At the top of the page there are multiple tabs that you can click on that show you their info, any notes on the lead, their email history, property view history, search history, and saved searches/favorites.
a. Info - Under the info tab, the first thing you’ll notice is the box with that leads contact information. If you’d like to add and /or edit their information, simply click the blue button in the box labeled Edit.
i. To the right of the contact info box, there is a drop down box labeled “Assigned To:” This will show which agent, if any, the lead is assigned to. If you wish to add or change which agent this lead is assigned to, simply select a new agent from the drop down box and click save.
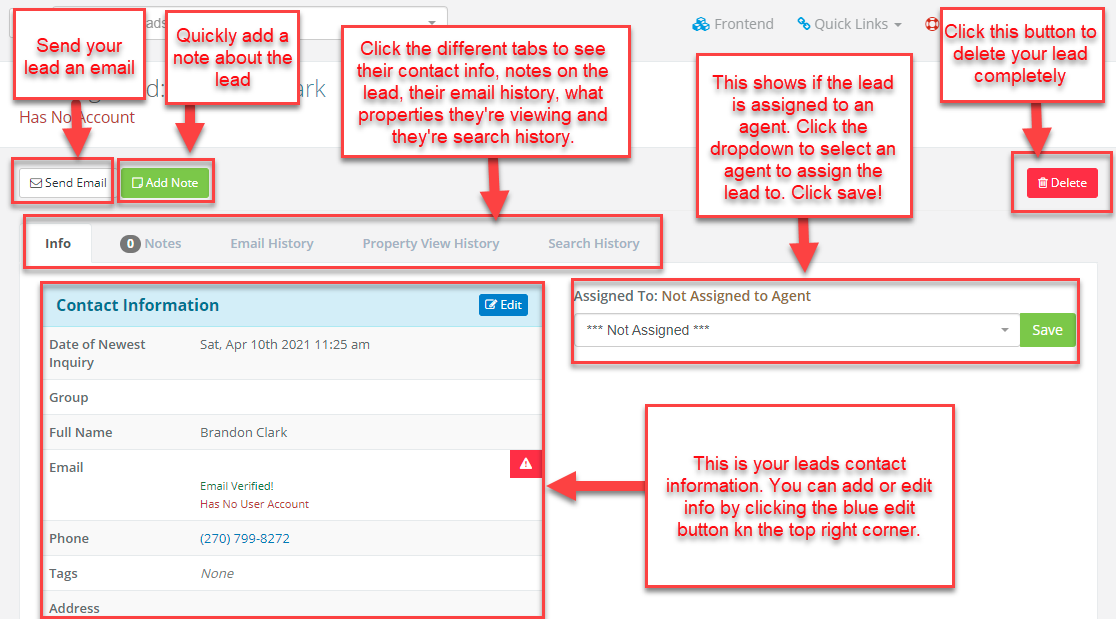
b. Notes - This is where you can add, you guessed it, notes about a lead.
i. To add a new note about a lead, simply click on the green button to the right labeled, Add Note.
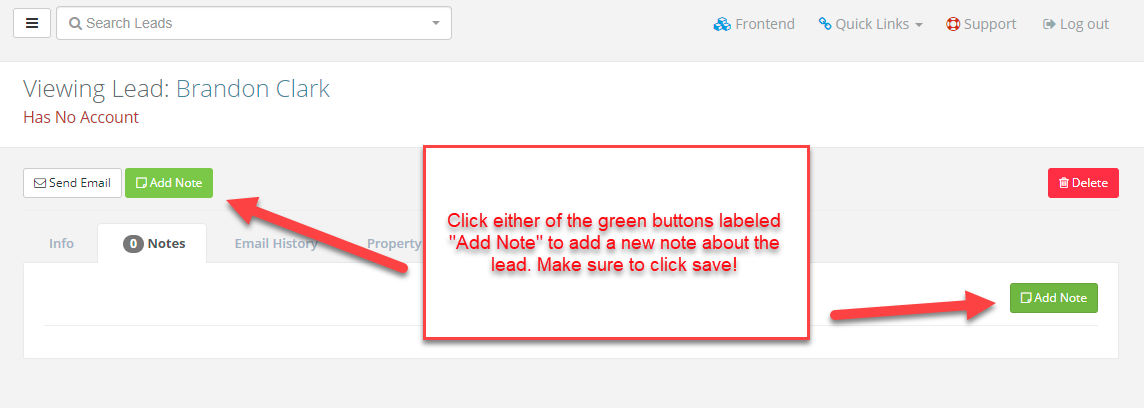
c. Email History - This tab lets you view a leads email history.
i. Once clicked on, you will see two boxes at the top that let you toggle back and forth to see both messages sent to the lead and subscription emails sent to the lead.
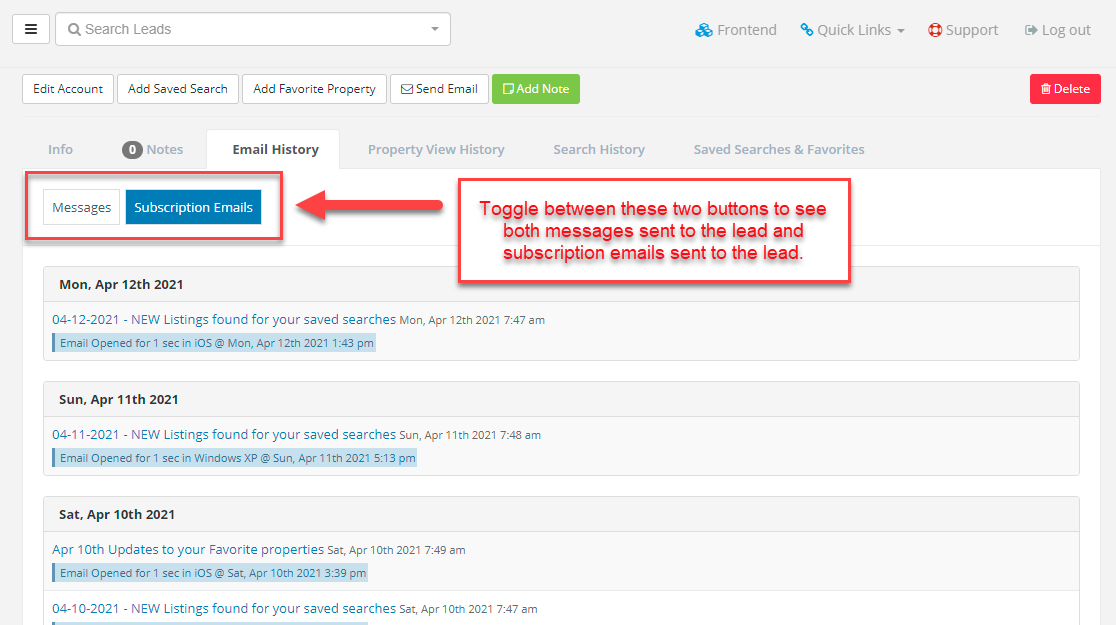
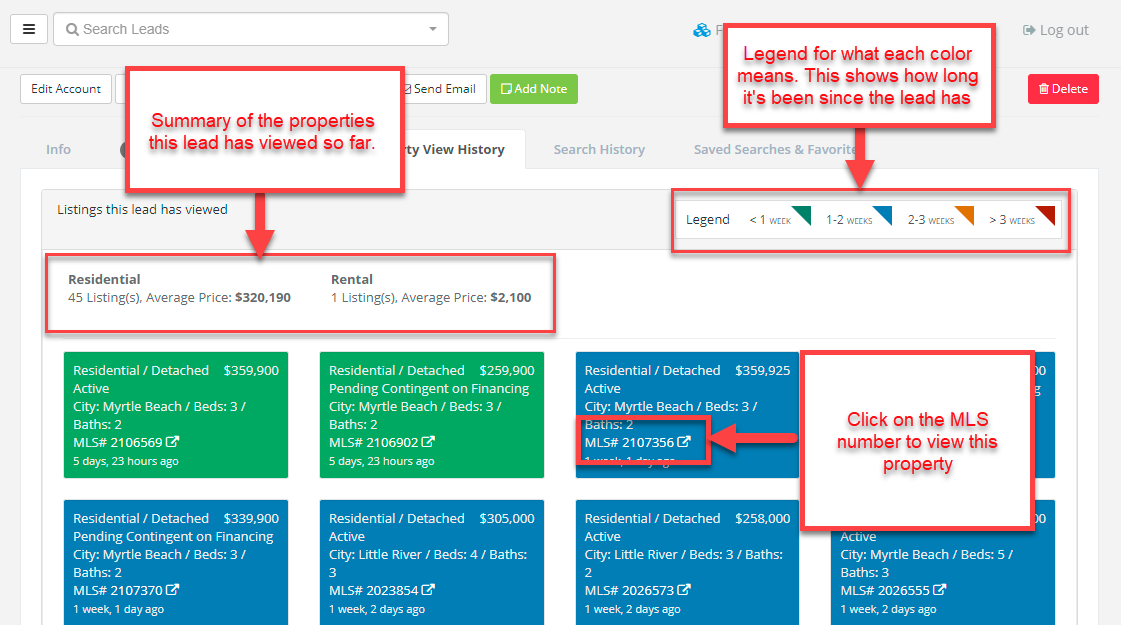
d. Property View History - This tab lets you view all properties that the lead has viewed.
i. You will notice that all the properties are color coded. There is a legend at the top right of the page showing what each color means and how long it has been since the lead viewed that property.
ii. Above the list of properties, there is a summary of what types of properties this lead has viewed, how many of each type they’ve viewed and what the average price is that they’re looking at.
iii. You can click on the MLS number on any property box to open a separate page and view that listing.
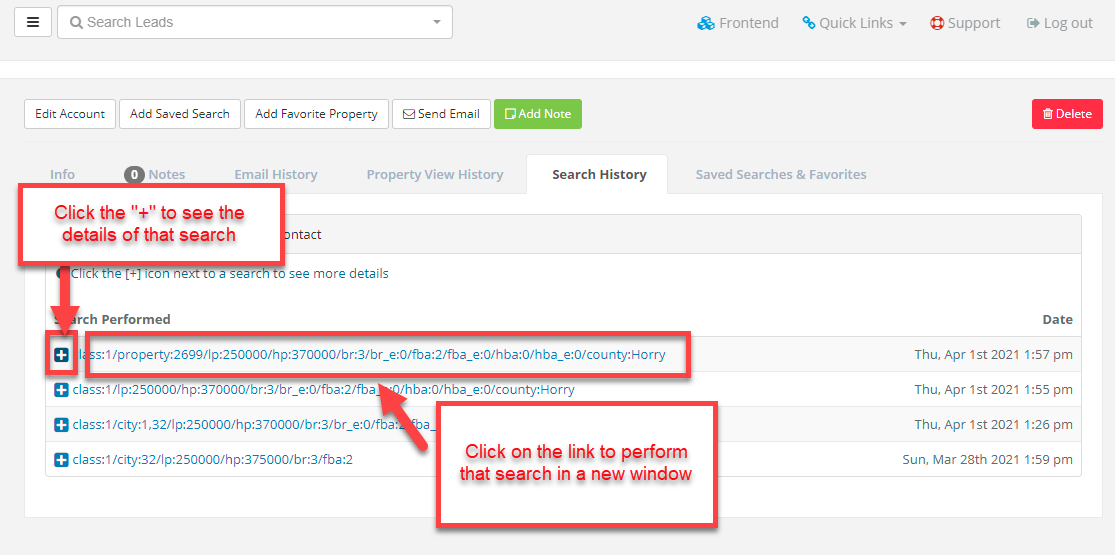
e. Search History - This tab lets you see the last 50 searches performed by this lead.
i. You can click on the [+] icon to the left of the search to see the search details and exactly what criteria what searched.
ii. You can click on the search link to open a separate page and perform that search.
f. Saved Searches and Favorites - This tab will show you this leads top 20 saved searches and favorited properties.
i. The “favorites” list shows you the MLS #, the property class, the price and the date it was added as a favorite.
ii. Click the button to the right of the property to view that listing.
iii. Click the red trash can icon to delete it from the list.
iv. The “Saved searches” list will show you the name the user gave that search and the date it was created.
v. Click the button to the right to perform that search.
vi. Click the pencil icon to edit the search criteria.
vii. Click the red trash can icon to delete it from the list.
7. Subscriber Email Tracking - When a registered user saves a search or favorites a property, they will get email notifications if there are any changes or updates on these properties or searches. You can click on the Subscriber Email Tracking tab on the admin panel and it will show you if the user has opened, viewed or responded to these emails, this way, you can see which leads are the most active.
8. LeadGroups - Lead groups help you categorize your leads in groups that you create and manage. Follow these steps to create a new lead group:
a. Go to Leads > Lead Groups on the admin panel.
b. Click the green button labeled “New Lead Group”
c. Add the Group name.
d. Add a description, if desired
e. Click Save!
**For directions on how to add a lead to a new lead group, refer to #5 above.**
9. Tags - While you can separate your leads into groups, you still might want to label them differently. This is where tags come in. You can create and add multiple tags to a lead and filter them just the way you want. Follow these steps to create a new tag:
a. Go to Leads > Tags on the admin panel.
b. In the green box, under Tag name, begin to type the tag name and add a comma at the end, or press enter. You can add as many as you’d like.
c. Click Save!
d. The list of tags will appear to the right of the page.
e. Click the pencil icon to edit the tags name.
f. Click the red trash can icon to delete a tag.
10. Decline Stats - Once you assign a lead to a certain agent, that agent has the option to decline the lead. If the agent declines a lead, a box will pop up that requires the agent to enter a reason why they chose to decline the lead. The admin will be able to see all declines and reasons behind them in the “Decline Stats” tab.
11. Lead Settings - The lead settings has 2 tabs: General and Lead Lottery
a. The General Lead Settings are pretty simple and gives you two options to turn on and off by checking and unchecking the boxes. If you change these settings, remember to click Update!
b. The Lead Lottery lets you add agents into a “lottery” where the system will give leads randomly to the agents in the lottery until they all have one, in which case it will start over.
i. Under Setup, you will see Lottery Options which will all be checked by default
ii. Below that is where you can select agents to add to the lottery.
iii. Once selected, click Add.
iv. Below that, you will see the list of agents currently in the lead lottery, along with what lead number they’re on and the total number of leads to be assigned.
v. Click the red trash can icon to remove a lead from the lottery.
vi. Click the blue button at the bottom of the page labeled “Assign Equal Lead Ratios” to adjust how many leads you’d like to distribute in the lottery. (Make sure to save once you’re done)
vii. To reset the lottery, click the red “Reset Lead Lottery” button.
viii. Click on the Logs tab at the top of the page to see all action made to the lead lottery.

