![]() Lead Groups
Lead Groups
If you are an admin, you can create Lead Groups to help you and your agents organize your leads by categorizing them into different groups.
1. Page Navigation:
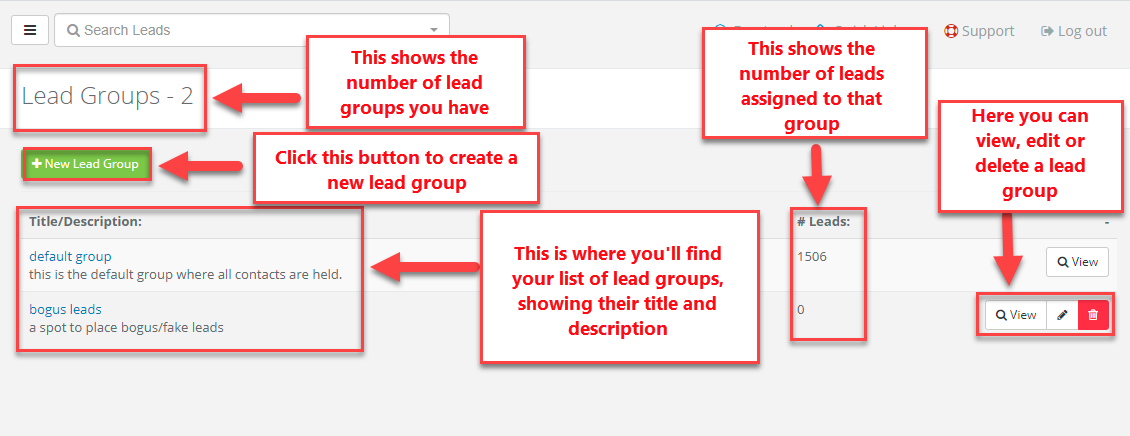
a. At the top of the page, you will notice the total amount of lead groups that have been created.
b. Below that is a green button labeled 'New Lead Group'. This is where you'd go to create a new group.
c. Below this is a list of all of your lead groups. First thing shown is the title and description of the group.
d. To the right of the title and description is the number of leads that are assigned to that group.
e. Beside the number of leads are three buttons; view, edit and delete.
2. If you click on the title of a group:
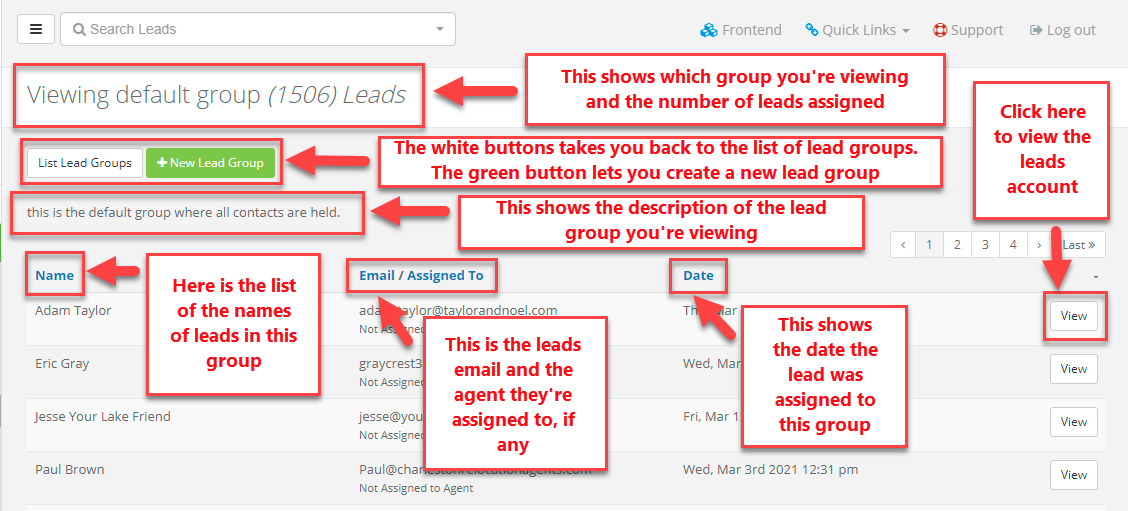
a. At the top of the page, you'll see the name of the group you are viewing and the total number of leads in that group.
b. Below that is a white button that will take you back to the list of lead groups and a green button where you can create a new group.
c. Below that is a description of the group you are viewing.
d. Finally, you will see the list of leads in this group starting with the leads name.
e. Next to their name is the leads email address and the name of the agent they are assigned to, if any.
f. Next to that is the date in which they were added to that lead group.
g. All the way to the right of the lead is a button that will let you view that leads account.
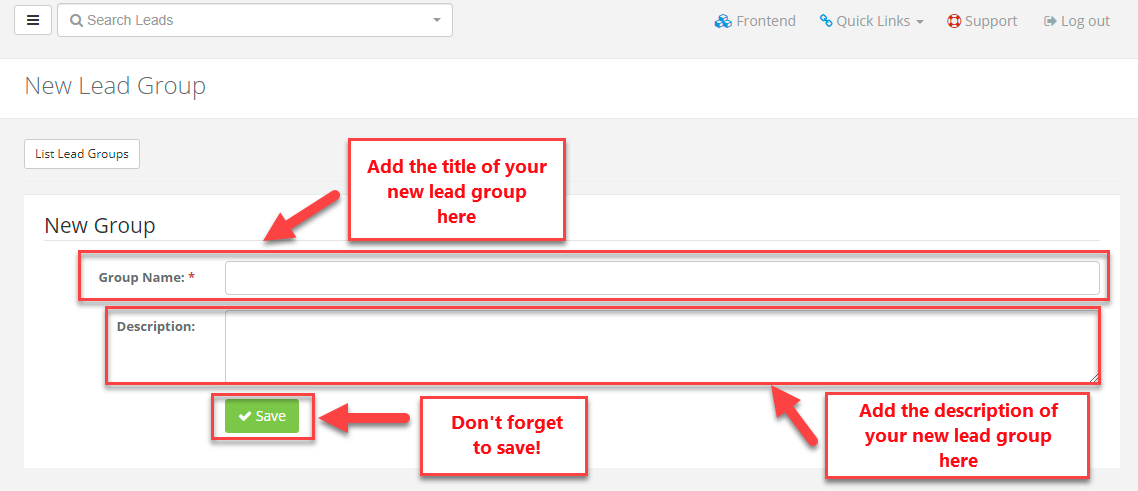
3. Follow these steps to create a new lead group:
a. On the back end of your site, go to Leads > Lead Groups on the admin panel.
b. Click the green button labeled “New Lead Group”
c. Add the group name.
d. Add a description, if desired
e. Click Save!